First setup and joining the team. Start with one site and team; add further settings later.
Screenshots of the current app with sample data and illustrative attachments. The app interface is in English; Help is available in English and Slovak.
A. I’m creating a workspace.
Create and verify your account.
Use Create an account, then I’ve verified my email.
Create your workspace.
In My workspaces → Create workspace, create your first site and team.
Invite a colleague.
In More → People → Add, enter their email, role and team. Share the app link with them; no automatic invitation email is sent.
Create your first task.
On Home, select New action, enter the brief, choose a person or team and select Create action.
B. I’ve been invited.
Use the invited email address.
Use Create an account or Sign in with an existing account.
Verify your email and accept the invitation.
After verification, select Accept in My workspaces. Invitations last 7 days; ask an Admin for a new one if it has expired.
Open the workspace and your tasks.
Select the workspace and open My actions. You do not need to create another workspace.
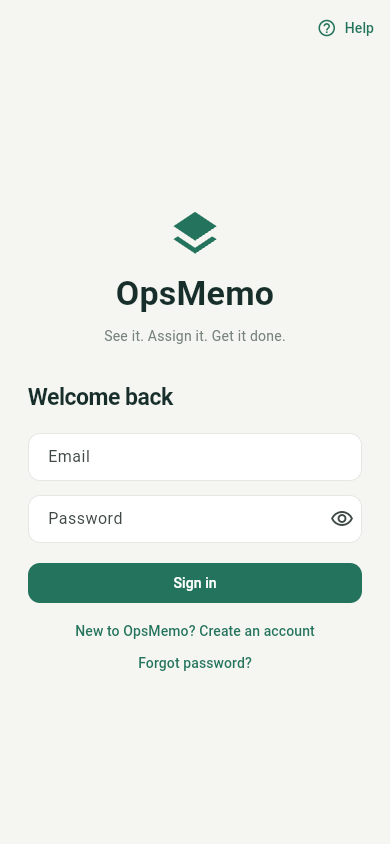
Open the app and switch from sign-in to account creation. Enter your email, password and password confirmation. Follow the verification link in your inbox, then select I’ve verified my email in the app. Already registered? Use Sign in.
Sign-in and the option to create an account. Enlarge screenshot ↗
Create your workspace
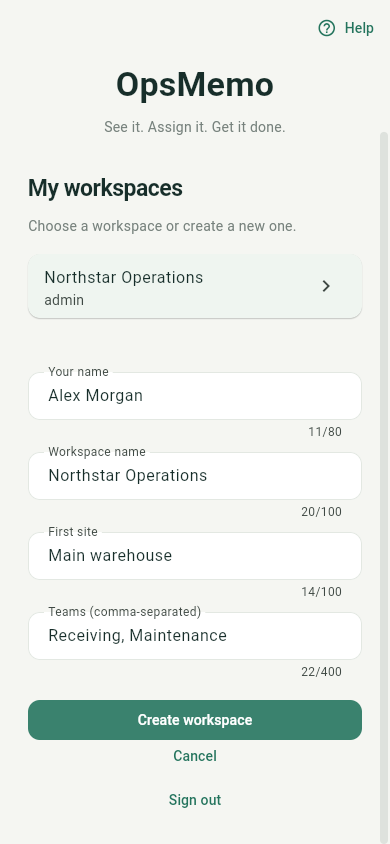
In My workspaces, choose Create workspace. Enter your name, your organisation’s name, the First site and team names separated by commas. Confirm with Create workspace. The creator becomes an Admin.
Your first workspace, site and teams in one form. Enlarge screenshot ↗
Invite people into the organisation
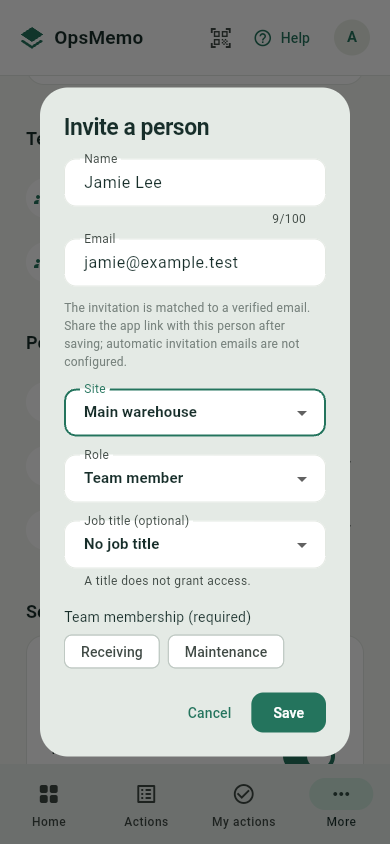
Under People, select Add. Enter a name, email, primary site, role and the appropriate team memberships or management scope. Save the invitation. The person registers with the same email, verifies it and selects Accept in My workspaces.
Invitations are matched to a specific verified email address. Enlarge screenshot ↗
These options are not prerequisites for your first task. Expand only what you need.
Organise your sites
Organise your sites
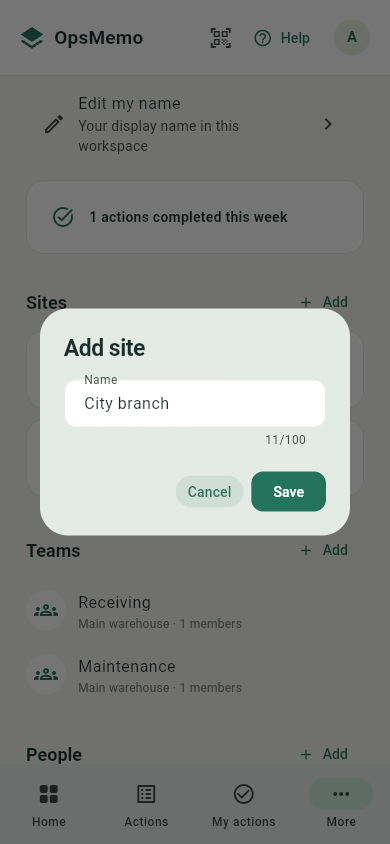
Open More, or Workspace settings from Home. Next to Sites, select Add and name the next site. A site can be a warehouse, store, factory or another separate operation.
Add another site to your shared workspace. Enlarge screenshot ↗
Create teams within each site
Create teams within each site
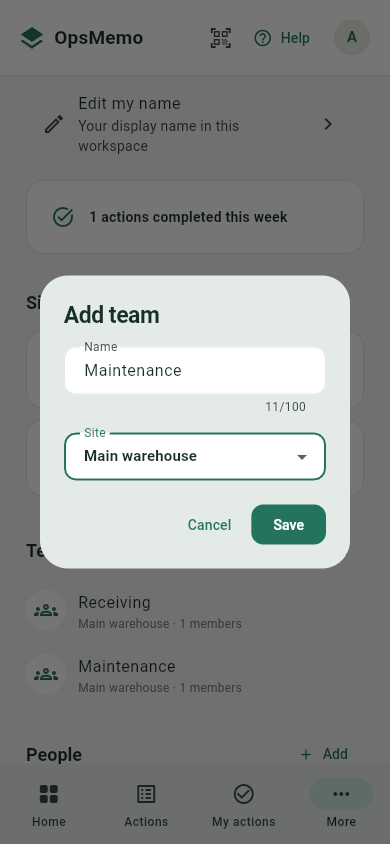
Next to Teams, select Add. Enter a name and choose a Site. Each team belongs to a specific site, for example Receiving or Maintenance. Add further teams later as needed.
Every team has a name and a site. Enlarge screenshot ↗
Choose what each manager manages
Choose what each manager manages
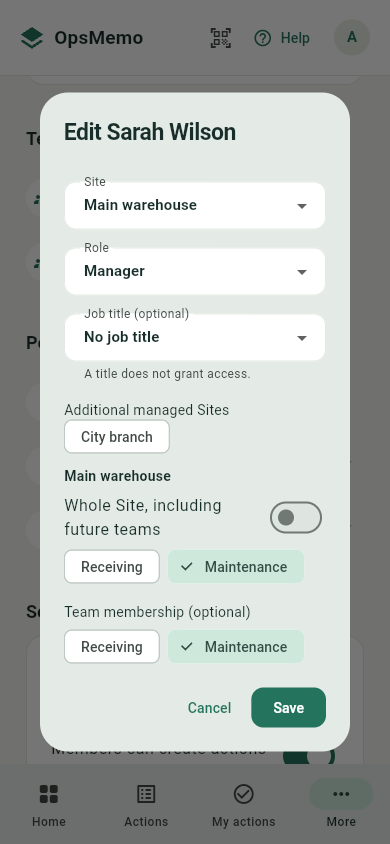
Select the Manager role. Under Additional managed Sites, choose their sites. For each site, enable Whole Site, including future teams, or select at least one specific team. The primary site is always included.
A manager manages selected teams or an entire site. Enlarge screenshot ↗
Give team members their teams
Give team members their teams
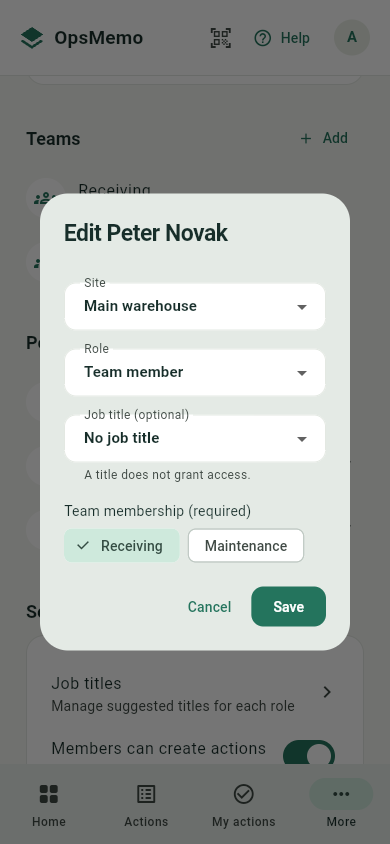
For the Team member role, select a site and at least one team. A person can belong to multiple teams at that site. Confirm with Save. Check memberships again when changing the primary site.
A Team member must belong to at least one team. Enlarge screenshot ↗
Add job titles and workspace rules
Add job titles and workspace rules
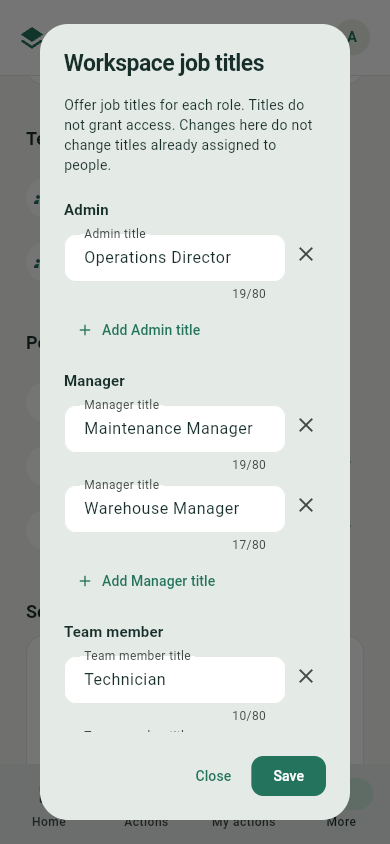
In More → Settings → Job titles, an Admin can define several titles for each role. Save keeps the editor open and shows confirmation. Continue editing or choose Close. When editing a person, select a preset or enter a custom title.
Suggested job titles for each role. Enlarge screenshot ↗